wordpress开发创建小工具入门教程
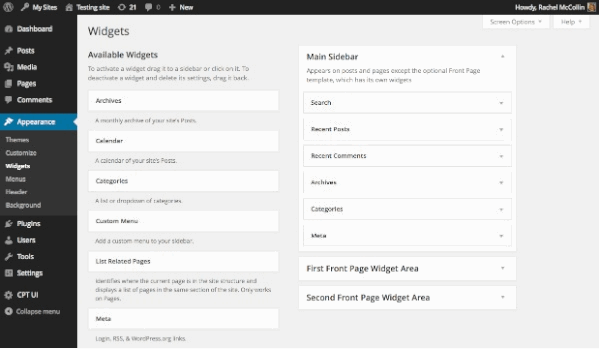
wordpress主小工具的创建对于我们开发自己的主题必不可少,它们能够添加菜单、列表供稿、文本以及更多东西到小工具区,并且不限于侧边栏。现在许多主题都在页脚添加了小工具区,并且大主题框架通常在多个位置设有小工具区,如头部或内容的上下方,导航区等等。
创建WordPress小工具的步骤
- 注册你的小工具
- 创建类来保存 widget 函数
- 编写一个 construc t函数来构建你的小工具
- 为小工具界面上的表单编写一个 form 函数
- 编写一个 update 函数以便小工具能够在表单中及时更新
- 编写一个定义输出的 widget函数
创建小工具类
首先是创建一个新类来拓展 WP_Widget 类,将下面代码复制进主题的 functions.php(本主题新建的图片小工具):
<?php
class PicWidget extends WP_Widget {
function __construct() {
//待填充
}
function form( $instance ) {
//待填充
}
function update( $new_instance, $old_instance ) {
//待填充
}
function widget( $args, $instance ) {
//待填充
}
}
?>
此类共包含4个函数,他们分别的作用是:
- __construct 函数会完成你所期望的——它会构造一个函数。在这个函数里面你可以做出一些定义,比如 WordPress 小工具的ID、标题和说明。
- form 函数会在 WordPress 小工具界面创建表单,让用户来定制或者激活它。
- update 函数确保 WordPress 能及时更新用户在 WordPress 小工具界面输入的任何设置。
- widget 函数则定义了在网站前端通过 WordPress 小工具输出的内容。
注册小工具
只有通过 WordPress 进行了注册,你的 WordPress 小工具才能工作。在你的新类下面加入以下函数和钩子
<?php
function register_widgets() {
register_widget( 'PicWidget' );
}
add_action( 'widgets_init', 'register_widgets' );
?>
register_widget() 函数是一个WordPress函数,它唯一的参数就是你刚刚创建的类的命名。
随后将你创建的函数挂入 widgets_init 钩子,确保它可以被 WordPress 拾起。
现在你已经开始创建你的 WordPress 小工具了。接下来就是填充上面的4个函数:
创建构造函数
你需要在 PicWidget 类里面填充你自己建立的__construct() 函数。找到”构造函数”,编辑如下
function __construct() {
// Instantiate the parent object
parent::__construct(
// 小工具ID
'pic',
// 小工具名称
"图片",
// 小工具选项
array (
'description' => "设置侧边栏图片"
)
);
}
以上代码定义了创建你的 WordPress 小工具需要的相关参数。它们分别是:
- WordPress 小工具的唯一ID
- WordPress 小工具在其界面上的名称
- 一系列在 WordPress 小工具界面显示的选项,包括选项说明。
创建表单
要为你的小工具创建表单,你需要填充已经添加 PicWidget 类中的 form 函数。找到form函数,编写如下
function form( $instance ) {
$depth = $instance[ 'depth' ];
$link = $instance[ 'link' ];
$title = $instance['title'];
//后台选项
?>
<p>
<label for="<?php echo $this->get_field_id('title'); ?>">填写图片标题</label>
<input name="<?php echo $this->get_field_name('title'); ?>" type="text" value="<?php echo esc_attr($title); ?>" />
</p>

<p>
<label for="<?php echo $this->get_field_id( 'depth' ); ?>">填写图片地址</label>
<input type="text" name="<?php echo $this->get_field_name( 'depth' ); ?>" value="<?php echo esc_attr( $depth ); ?>">
</p>

<p>
<label for="<?php echo $this->get_field_id( 'link' ); ?>">填写图片链接</label>
<input type="text" name="<?php echo $this->get_field_name( 'link' ); ?>" value="<?php echo esc_attr( $link ); ?>">
</p>
<?php
}
上述代码在后台小工具界面内创建了一个可输入的表单,但是如果你尝试在其中输入一些内容,它不会被保存下来。因此你需要进一步完善让这个表单能保存你所输入的内容。
允许表单更新
要做到这一点你需要处理之前创建的 update 函数。编码如下
function update( $new_instance, $old_instance ) {
// 保存小工具选项
$instance = $old_instance;
$instance[ 'depth' ] = strip_tags( $new_instance[ 'depth' ] );
$instance[ 'link' ] = strip_tags( $new_instance[ 'link' ] );
$instance['title'] = strip_tags($new_instance['title']);
return $instance;
}
上述代码用新值(new_instance)代替了 depth 字段的旧值(old_instance),并采用 strip_tags 进行消毒。现在你可以在其中进行任意的输入并保存了。
现在你终于为你的WordPress小工具创建了一个工作表单,可以说一切都准备就绪了,那么下一步就是在网站上显示你的WordPress小工具啦。
编辑 widget 函数
下一步你需要做的便是编辑还未填充的 widget 函数。如下面的输出图片
function widget( $args, $instance ) {
// 小工具输出
$url = $instance[ 'depth' ];
$link = $instance[ 'link' ];
$title = $instance['title'];
extract( $args );
echo $before_widget;
?>
<div >
<a  ><img src="<?php echo $url; ?>" title="<?php echo $title; ?>" style="max-width: 100%;"></a>
</div>
<?php
}
完整的代码
回顾以上步骤,添加小工具代码全文应如下所示
class PicWidget extends WP_Widget {
function __construct() {
// Instantiate the parent object
parent::__construct(
// 小工具ID
'pic',
// 小工具名称
"图片",
// 小工具选项
array (
'description' => "设置侧边栏图片"
)
);
}
function widget( $args, $instance ) {
// Widget output
// kick things off
$url = $instance[ 'depth' ];
$link = $instance[ 'link' ];
$title = $instance['title'];
extract( $args );
echo $before_widget;
?>
<div >
<a  ><img src="<?php echo $url; ?>" title="<?php echo $title; ?>" style="max-width: 100%;"></a>
</div>
<?php
}
function update( $new_instance, $old_instance ) {
// Save widget options
$instance = $old_instance;
$instance[ 'depth' ] = strip_tags( $new_instance[ 'depth' ] );
$instance[ 'link' ] = strip_tags( $new_instance[ 'link' ] );
$instance['title'] = strip_tags($new_instance['title']);
return $instance;
}
function form( $instance ) {
// Output admin widget options form
$defaults = array(
'depth' => '-1'
);
$depth = $instance[ 'depth' ];
$link = $instance[ 'link' ];
$title = $instance['title'];
// markup for form
?>
<p>
<label for="<?php echo $this->get_field_id('title'); ?>">填写图片标题</label>
<input name="<?php echo $this->get_field_name('title'); ?>" type="text" value="<?php echo esc_attr($title); ?>" />
</p>
<p>
<label for="<?php echo $this->get_field_id( 'depth' ); ?>">填写图片地址</label>
<input type="text" name="<?php echo $this->get_field_name( 'depth' ); ?>" value="<?php echo esc_attr( $depth ); ?>">
</p>
<p>
<label for="<?php echo $this->get_field_id( 'link' ); ?>">填写图片链接</label>
<input type="text" name="<?php echo $this->get_field_name( 'link' ); ?>" value="<?php echo esc_attr( $link ); ?>">
</p>
<?php
}
}
function register_widgets() {
register_widget( 'PicWidget' );
}
add_action( 'widgets_init', 'register_widgets' )
本文转自:http://www.511yj.com/wordpress-themes-gongju.html